Tag: DialNext

  • How to Configure and Manage Outbound Caller ID in DialNext

    How to Configure and Manage Outbound Caller ID in DialNext

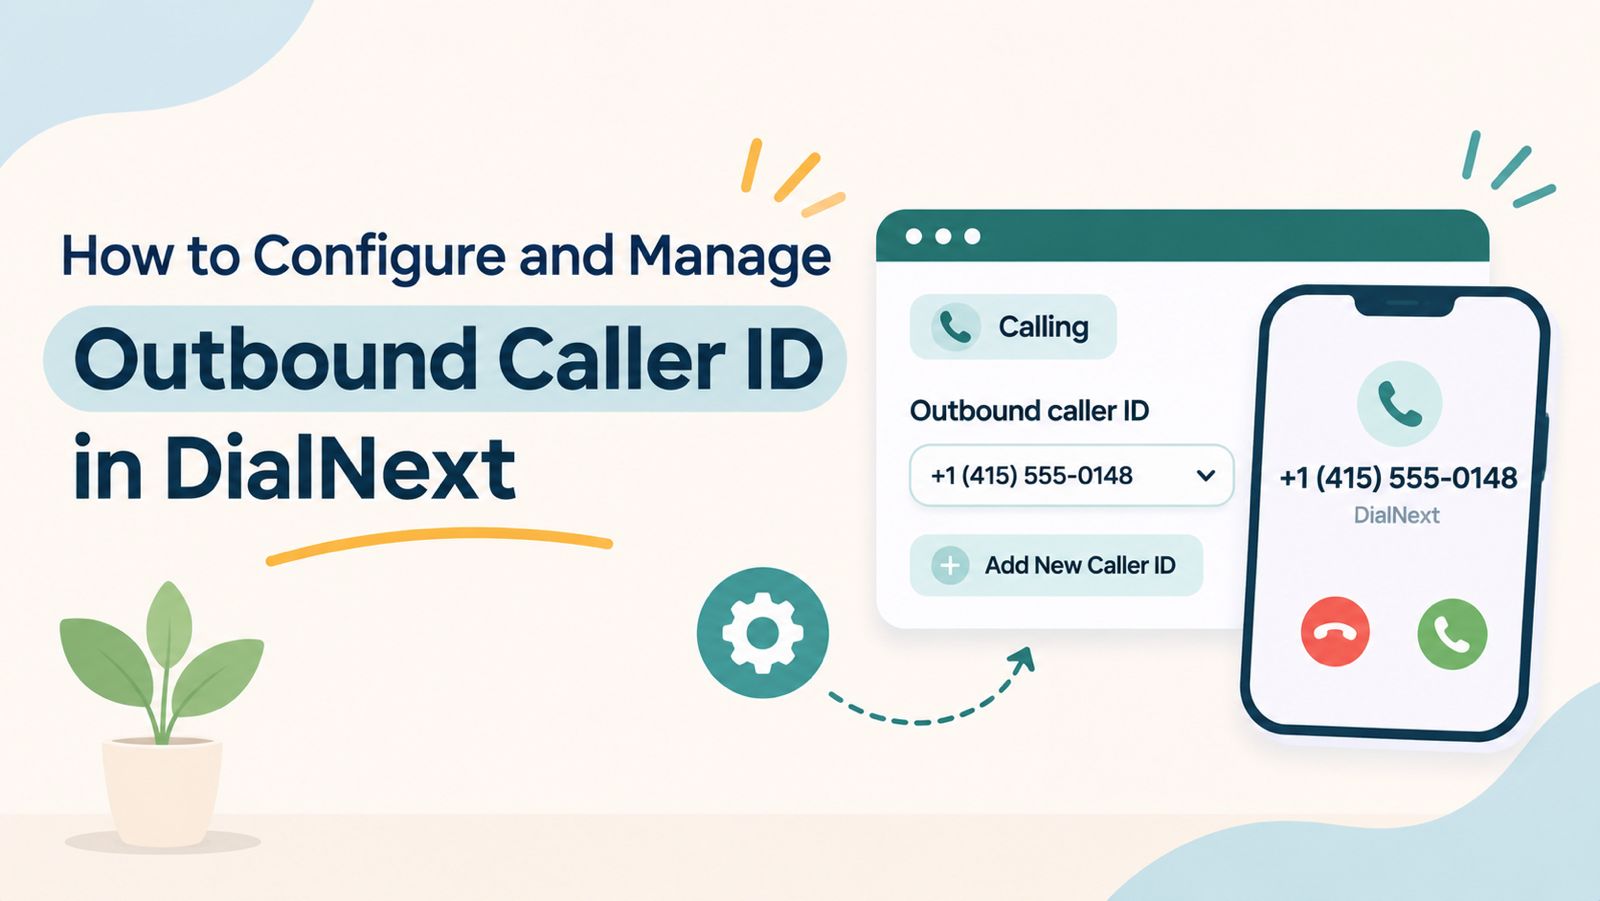
    Outbound Caller ID in DialNext helps businesses manage the phone number displayed to recipients when making outgoing calls. Users can access the Outbound Caller ID setting through their phone number configuration.

    For sales and customer support teams, displaying an appropriate business number helps recipients identify incoming business calls. Therefore, configuring the correct caller ID is an important part of managing outbound communication.

    In this guide, you will learn how to access the Outbound Caller ID setting, add a new caller ID, and select an available phone line from the DialNext Dialer before placing an outgoing call.

    What Is Outbound Caller ID?

    Outbound Caller ID is the phone number displayed to a recipient when someone makes an outgoing call.

    For example, when a sales representative contacts a prospect through DialNext, the configured caller ID determines the number associated with that outgoing call. This helps businesses manage how their outbound calls are presented to recipients.

    How to Configure Outbound Caller ID in DialNext

    Follow these steps to access and manage the Outbound Caller ID setting in your DialNext account.

    Step 1: Open the Phone Numbers Section

    First, log in to your DialNext account. Then, navigate to Phone Numbers from the left-hand sidebar.

    Once the page opens, you can view the phone numbers available in your workspace. The page also displays important information about each number, including:

    • Phone Number
    • Type
    • Capabilities
    • Access

    This overview helps you identify the phone number you want to configure. Therefore, locate the appropriate number before proceeding.

    Step 2: Open Phone Number Configuration

    Next, find the phone number you want to manage.

    1. Click the three-dot menu next to the selected phone number.
    2. Select Configure number from the available options.
    3. The phone number configuration page will open.

    From this page, you can access different configuration sections, including Overview, Calling, Routing, Messaging, and Access.

    Step 3: Navigate to the Calling Tab

    After opening the phone number configuration page, select the Calling tab.

    Next, locate the Outbound caller ID setting. You will see a dropdown that currently displays Default.

    According to the description displayed in DialNext, this setting determines which number appears when you make outgoing calls.

    Click the dropdown to view the available options.

    Step 4: Add a New Caller ID

    If you want to add another caller ID, you can start the process directly through the Outbound Caller ID dropdown.

    Follow these instructions:

    1. Click the Outbound caller ID dropdown.
    2. Select Add New Caller ID.
    3. A dialog titled Add Caller ID will appear.
    4. Select the appropriate country code and enter the phone number in the Phone number field.
    5. If applicable, enter an extension in the Extension (Optional) field.

    Before proceeding, review the information you have entered.

    Important: The subsequent submission, verification, and activation process has not been confirmed in the available DialNext dashboard. Therefore, follow the instructions displayed in your account. Do not assume a particular verification method or activation process.

    How to Select a Phone Line from the DialNext Dialer

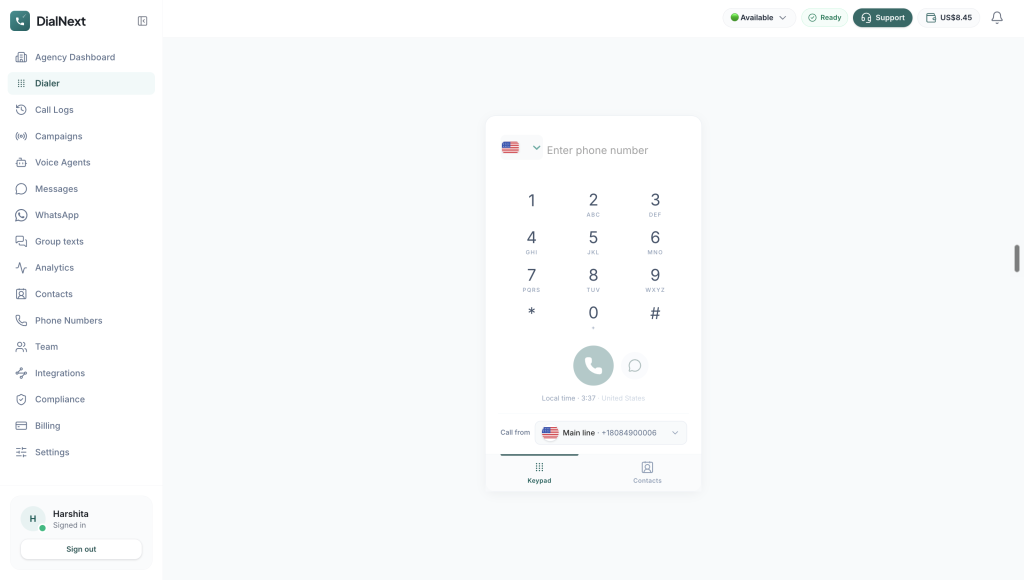
    In addition to the Outbound Caller ID setting, DialNext provides a Call from dropdown in the Dialer. This option allows users to select an available phone line before placing an outgoing call.

    To select a phone line, follow these steps:

    1. Navigate to Dialer from the left-hand sidebar.
    2. Locate the Call from option below the dial pad.
    3. Click the dropdown arrow to view the available phone lines.
    4. Review the displayed options.
    5. Select the phone line you want to use for your outgoing call.

    Once selected, the chosen phone line will appear in the Call from field. This makes it easier to choose an available line before initiating an outgoing call.

    Note: The Outbound Caller ID setting and the Call from dropdown are presented in different areas of DialNext. The first is available in phone number configuration, while the second allows users to select an available phone line from the Dialer. Refer to the options displayed in your account when configuring or selecting a number.

    You can also read more about outbound calling efficiency in DialNext.

    Other Calling Settings in DialNext

    While managing Outbound Caller ID, you may notice several other settings under the Calling tab.

    These options include:

    • Ring duration: Displays the configured call ringing duration.
    • Assign missed calls to: Shows the selected assignee for missed calls.
    • Record calls: Displays whether call recording is enabled.
    • Transcribe calls: Displays whether call transcription is enabled.
    • Play compliance announcement before recording: Displays the current announcement setting.

    For more information about call recording, read our guide on How to Access and Manage Call Recordings in DialNext.

    These are separate calling configurations. Therefore, you do not need to change them simply to access the Outbound Caller ID setting.

    Frequently Asked Questions

    1. What is Outbound Caller ID in DialNext?

    Outbound Caller ID determines which phone number is displayed to recipients when making outgoing calls. In DialNext, users can access this setting through the Calling tab in phone number configuration.

    2. Where can I find Outbound Caller ID settings in DialNext?

    First, navigate to Phone Numbers from the left-hand sidebar. Next, click the three-dot menu beside the required number and select Configure number. Finally, open the Calling tab to find the Outbound caller ID setting.

    3. How can I add a new Caller ID in DialNext?

    To start adding a new Caller ID, open the Outbound caller ID dropdown and select Add New Caller ID. Then, enter the phone number along with its country code. You can also provide an extension if applicable. Follow any additional instructions displayed in your DialNext account.

    4. What is the Call from option in DialNext?

    The Call from option appears below the Dialer keypad. It allows users to view available phone lines and select one before placing an outgoing call.

    5. Can I select different phone lines in the Dialer?

    The Call from dropdown displays the phone lines available in your workspace. You can select an appropriate line from the displayed options before making an outgoing call.

    Additional Resources

    Explore the following resources to learn more about DialNext and its business communication capabilities.

    DialNext Resources

    External Documentation

    Note: This external resource explains Twilio’s calling services. Its verification procedures should not be treated as DialNext configuration instructions.

    Need Help?

    If you need assistance with Outbound Caller ID configuration or have questions about the available phone number settings, contact the DialNext support team at help@dialnext.io.

    You can also visit the DialNext official website to explore its business communication solutions.

    Start managing your business calls more effectively with DialNext!

  • How to Create a Group Text in DialNext: Step-by-Step Guide

    How to Create a Group Text in DialNext: Step-by-Step Guide

    Group Texting in DialNext allows users to bring multiple participants together in a shared SMS conversation. Instead of sending the same message individually, you can create a group, assign it a name, select a sending number, and send an initial message to all participants.

    Moreover, Group Texting makes it easier to organize business communication when multiple people need to receive the same information. In this guide, you’ll learn how to create a Group Text in DialNext, select a sending number, add participants, and send your first message step by step.

    Before You Begin

    Before creating a Group Text in DialNext, make sure you have:

    • Access to your DialNext account.
    • At least two participants to create a group.
    • The phone numbers of the participants you want to add.
    • Access to a DialNext line for sending the group message.

    Additionally, keep your group name and initial message ready before starting the creation process.

    How to Use Group Texting in DialNext to Create a Group

    Follow these steps to create a new Group Text conversation in DialNext.

    Step 1: Access Group Texting in DialNext

    First, log in to your DialNext account using your credentials.

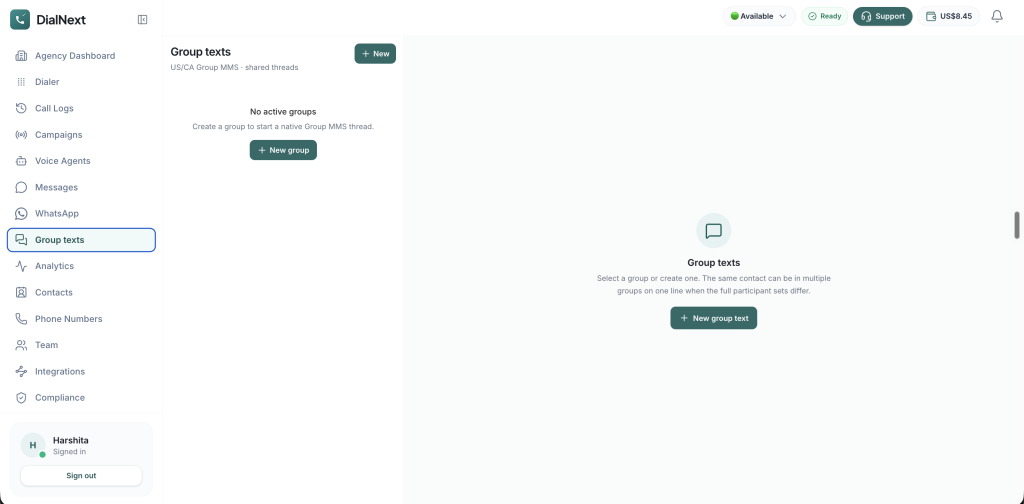
    Next, locate the left-hand navigation menu in your dashboard. Then, click Group texts to access the Group Texts dashboard.

    Here, you can start creating a new group conversation.

    Step 2: Start a New Group Text Conversation

    Once the Group Texts dashboard opens, locate the New group text button.

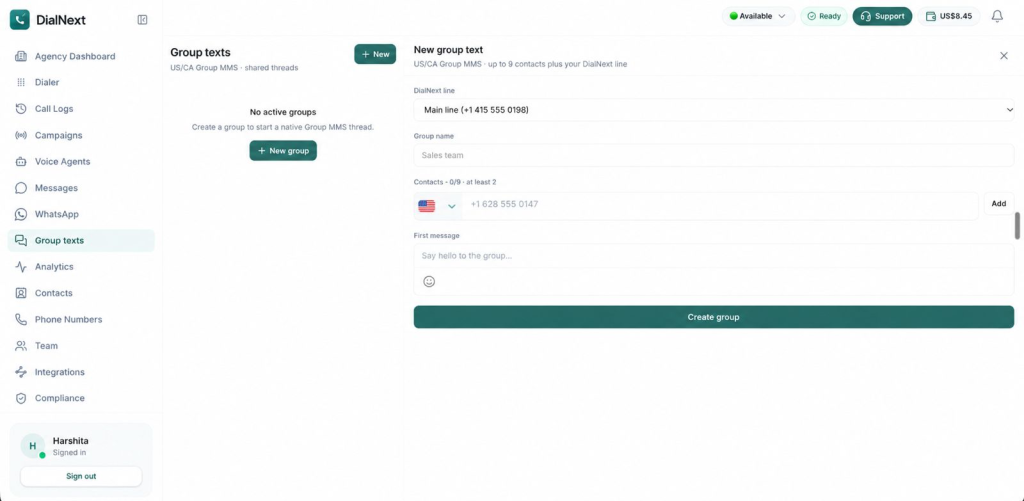
    Next, click this button to open the group creation form. You can then enter the required group details and add participants.

    Step 3: Select a DialNext Line

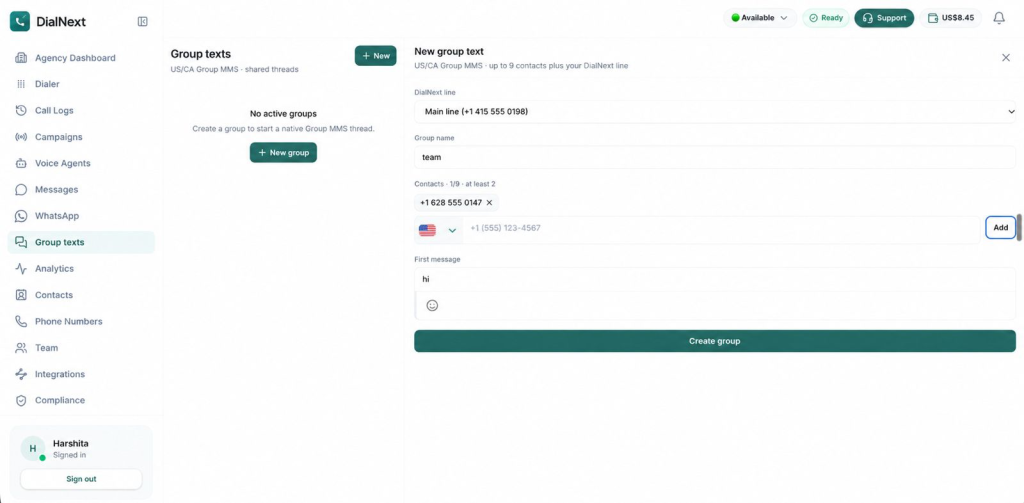
    Under the DialNext line field, select the phone number you want to use for the group conversation.

    This number will serve as the sending line for your Group Text. Therefore, make sure you select the correct number before proceeding.

    Step 4: Enter a Group Name

    Next, locate the Group name field and enter a suitable name for your conversation.

    For example, choose a name that clearly identifies the purpose of the group. This makes it easier to recognize the conversation when reviewing your group messages later.

    Step 5: Add Participants to Your Group Text

    Under the Contacts section, enter the phone numbers of the participants you want to include in your group.

    Follow these steps:

    1. First, select the appropriate country code.
    2. Next, enter the participant’s phone number.
    3. Then, click Add to include the contact in the group.
    4. Finally, repeat the process to add additional participants, if required.

    Important: Group Texting in DialNext requires at least 2 participants. You can add up to 9 contacts to a group, in addition to your selected DialNext line.

    Before proceeding, review the participant list carefully to make sure the correct contacts have been added.

    Step 6: Compose Your First Group Text Message

    Once you have added the participants, locate the First message field.

    Enter the message you want to send to all participants when the group is created.

    For example, you can write a short introductory message explaining the purpose of the group. Additionally, make sure the message is clear and relevant to everyone included in the conversation.

    Before proceeding, review your message carefully to check for any errors or missing information.

    Step 7: Review and Create Your Group Text

    Before creating the group, review all the information you have entered.

    Make sure the following details are correct:

    • Selected DialNext line.
    • Group name.
    • Participant phone numbers.
    • First message.

    Once you have checked these details, click the Create group button to create your Group Text conversation in DialNext.

    The initial message is sent to the added participants as part of the group creation process. Therefore, review its content carefully before selecting Create group.

    Important Group Texting Requirements in DialNext

    Before creating a Group Text conversation, keep the following requirements in mind:

    • Minimum participants: At least 2 participants are required to create a group.
    • Maximum participants: You can add up to 9 contacts, in addition to your selected DialNext line.
    • DialNext line: Select the correct sending number before creating the group.
    • Group name: Choose a clear and recognizable name for your conversation.
    • First message: Review your initial message carefully because it is sent when the group is created.

    Additionally, check the participant details before completing the process to avoid adding an incorrect phone number.

    Frequently Asked Questions About Group Texting in DialNext

    1. How Many Participants Can I Add to Group Texting in DialNext?

    You need at least 2 participants to create a group. Additionally, DialNext allows you to add up to 9 contacts to a group, along with your selected DialNext line.

    2. Can I Assign a Custom Name to My Group Text?

    Yes. You can enter a custom name in the Group name field while creating a new group. This helps you identify the conversation more easily.

    3. Can I Select a Phone Number for Sending Group Texts?

    Yes. You can select your preferred number from the DialNext line dropdown before adding participants and creating the group.

    4. Can I Send an Initial Message While Creating a Group?

    Yes. The First message field allows you to compose your initial message. Once you create the group, this message is sent to the added participants.

    5. Is Adding Two Participants Mandatory?

    Yes. At least two participants are required to create a Group Text conversation in DialNext.

    Conclusion

    Group Texting in DialNext makes it easier to bring multiple participants together in a shared SMS conversation. Users can select a sending number, assign a group name, add contacts, and send an initial message when creating the group.

    Moreover, organizing participants in a shared conversation can make business communication more convenient when multiple people need to receive the same information. By reviewing the group details before creation, you can ensure that the correct participants and message are included.

    Get Started with DialNext Group Texting

    Ready to simplify communication with multiple participants? Group Texting in DialNext helps you bring people together in a shared conversation and send messages through your selected business number.

    Explore DialNext to learn more about its business communication solutions.

    Need assistance? Contact our team at support@dialnext.io.

    Related Articles

    Explore these resources to learn more about DialNext features and business communication:

  • How to Access and Manage Call Recordings in DialNext

    How to Access and Manage Call Recordings in DialNext

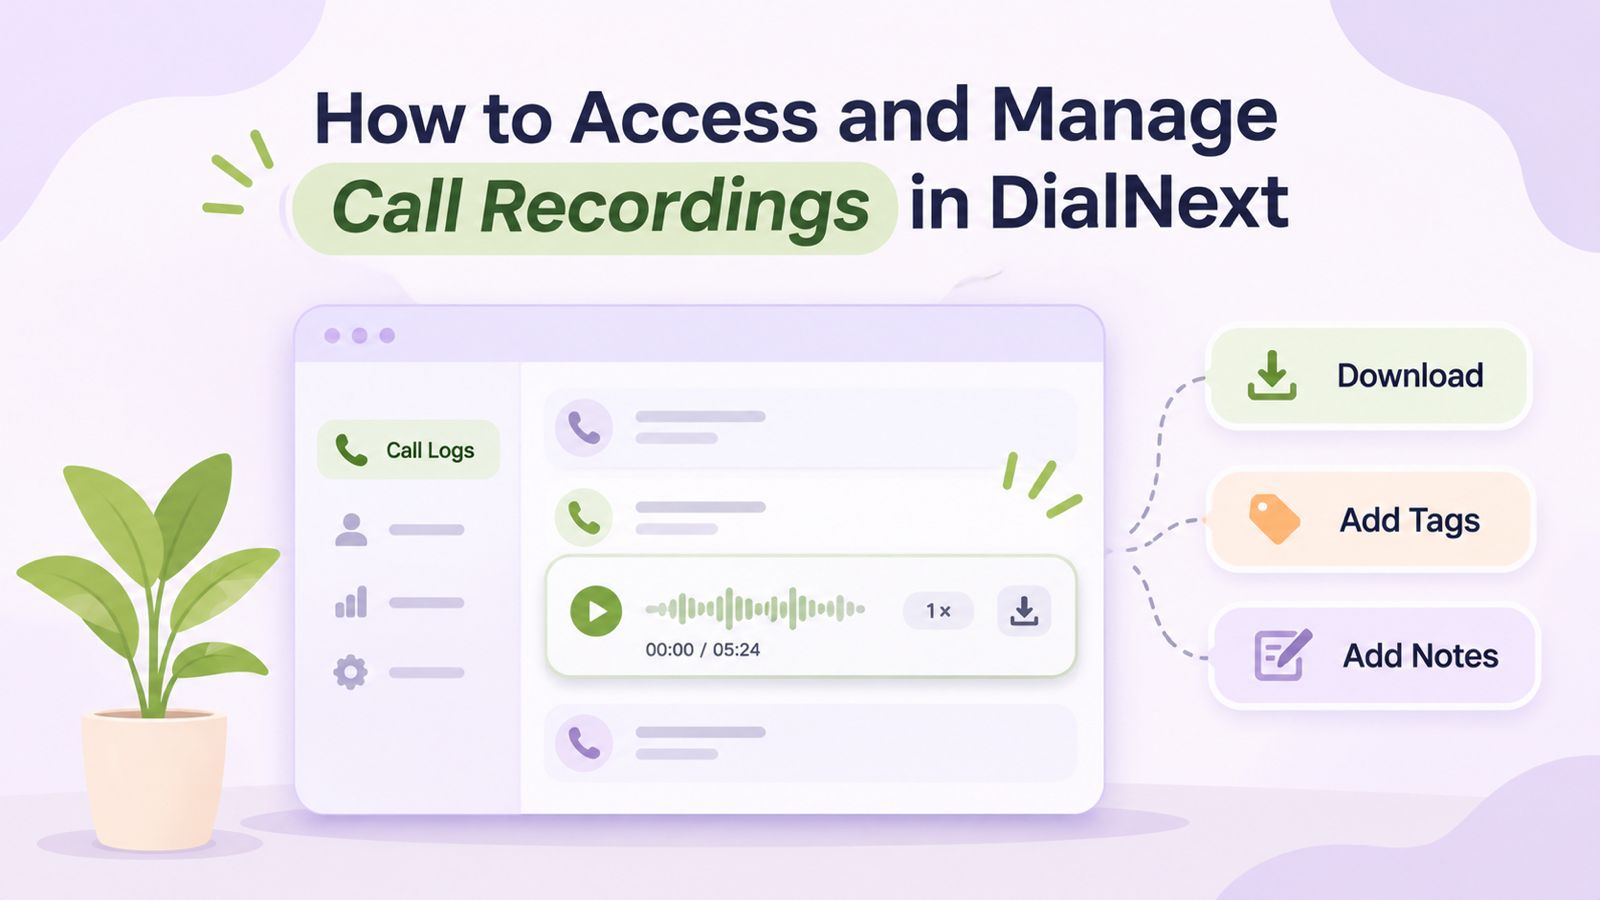
    Call recordings in DialNext help businesses review customer conversations, revisit important details, and maintain useful records of previous interactions. Through the Call Logs section, users can access available recordings, listen to conversations, download audio files, and organize call information using notes and tags.

    Moreover, these features make it easier for teams to understand previous customer interactions and find relevant information when needed. Whether you want to review a customer query, check a conversation, or organize call details, DialNext provides useful tools to manage your calling activity.

    In this guide, you will learn how to access, play, download, and manage call recordings in DialNext, along with practical tips for keeping your call records organized.

    How to Access Call Recordings in DialNext

    You can access available call recordings directly through the Call Logs section of your DialNext dashboard. Before proceeding, make sure you can sign in to your account and access the relevant call records.

    Follow these steps to find and play a recording.

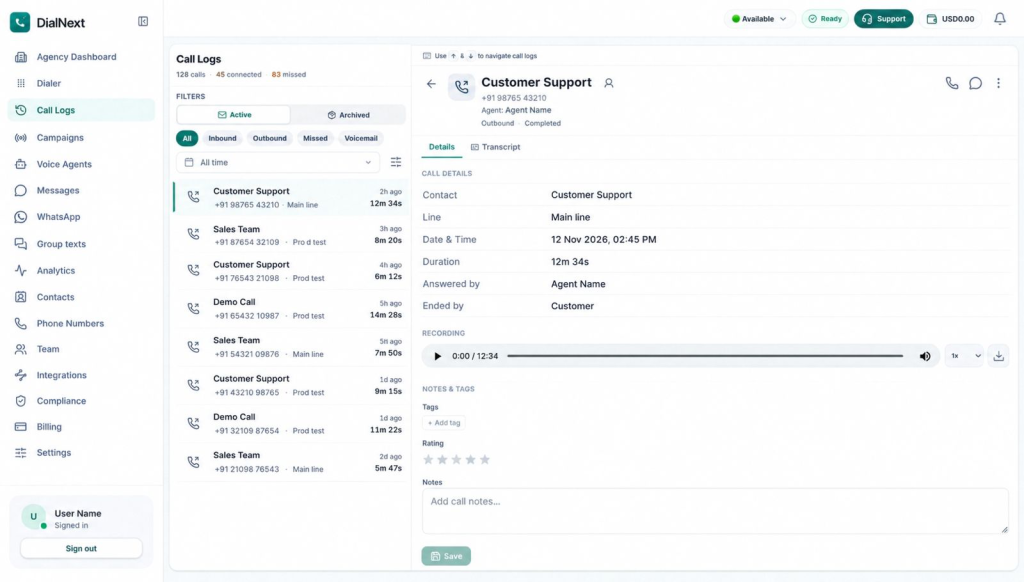
    Step 1: Navigate to Call Logs in DialNext

    First, log in to your DialNext account using your login credentials.

    Next, locate the navigation menu on the left side of your dashboard. Then, click Call Logs to open your call history and view the available call records.

    Step 2: Select a Call Record

    Once the Call Logs page opens, browse the available records to find the conversation you want to review.

    Additionally, you can use the available filters, such as Inbound, Outbound, Missed, and Voicemail, to narrow down the list. This makes it easier to locate a specific call without reviewing your entire call history.

    After finding the relevant record, select it to open its details.

    For more information about using these filters, read our guide on How to View and Filter Call Logs in DialNext.

    Step 3: Open the Call Details

    After selecting a call, locate the Details tab in the call details panel on the right side of the screen.

    Here, you can review information associated with the selected call, including the contact, calling line, date and time, duration, and answering agent.

    Next, locate the Recording section to check whether an audio recording is available for that call.

    Step 4: Play Call Recordings in DialNext

    If a recording is available, locate the audio player in the Recording section.

    Then, click the Play button to listen to the conversation. Additionally, you can use the playback speed control to adjust how quickly the recording plays, depending on the available options.

    As a result, you can revisit important parts of a conversation, understand customer queries, and check specific details without relying only on written notes.

    Step 5: Download Call Recordings in DialNext

    If you want to save an available recording to your device, locate the Download icon next to the audio player.

    Next, select the icon to download the audio file, provided the download option is available for that recording.

    This allows you to keep a copy for future reference. However, always follow your organization’s recording, privacy, and data-handling policies when accessing or downloading customer conversations.

    How to Manage Call Recordings in DialNext

    Accessing a recording is only one part of managing call information. In addition to listening to conversations, DialNext provides options to organize additional details associated with individual call records.

    For example, you can use notes, tags, and ratings to make previous interactions easier to understand and review.

    1. Add Tags to Call Records in DialNext

    Tags help categorize call records based on their purpose or outcome.

    To add a tag, follow these steps:

    1. First, open the required call record from the Call Logs section.
    2. Next, navigate to the Notes & Tags section in the call details panel.
    3. Then, click + Add tag under the Tags section.
    4. Finally, select the relevant tag from the available options.

    For example, your team may use suitable tags to identify calls that require follow-up or additional attention, depending on the available tag options.

    Furthermore, using consistent tags can make it easier to organize and identify important call records.

    2. Review Call Ratings in DialNext

    DialNext also provides a star-rating field in the Notes & Tags section.

    You can review the rating associated with an individual call record to understand its recorded assessment. Additionally, this information provides more context when reviewing previous customer interactions.

    3. Add and Save Call Notes in DialNext

    Call notes help your team retain important information about a conversation. For instance, you can add a short summary or mention details that another team member may need later.

    To add notes:

    1. First, open the required call record.
    2. Next, navigate to the Notes & Tags section.
    3. Then, locate the Notes text box.
    4. Enter a short summary or other relevant information about the conversation.
    5. Before saving, review the note to ensure it contains the correct details.
    6. Finally, click Save to store your changes.

    As a result, your team can refer to relevant call information without having to listen to the entire recording again.

    You can also explore How to Use Call Transcription and AI Insights in DialNext to learn more about reviewing call conversations and accessing available call insights.

    Benefits of Using Call Recordings in DialNext

    Call recordings can support several everyday business activities. When used appropriately, they help teams revisit conversations and maintain better visibility into customer interactions.

    Here are some practical ways businesses can use call recordings:

    • Review customer conversations: Listen to previous interactions to understand customer queries, responses, and important discussion points.
    • Maintain useful call records: Keep available recordings for future reference, subject to organizational policies.
    • Support team coordination: Provide relevant conversation context to team members when appropriate.
    • Organize call information: Use notes and tags to keep important details associated with individual call records.
    • Verify conversation details: Revisit recordings when specific information needs to be checked.

    Furthermore, combining recordings with call details, notes, and tags can make it easier to review customer interactions. Therefore, teams can find relevant information and understand previous conversations more efficiently.

    Best Practices for Managing Call Recordings in DialNext

    Managing recordings effectively requires more than simply accessing and downloading audio files. Instead, a consistent process can help teams keep call information organized and handle customer data responsibly.

    Consider the following best practices:

    Follow Recording and Privacy Policies

    First, make sure your team follows applicable recording requirements and organizational privacy policies. Additionally, access recordings only when there is a legitimate business need.

    Use Relevant Tags

    Apply consistent tags to categorize calls based on their purpose or outcome. As a result, your team can identify relevant records more easily.

    Add Clear and Useful Notes

    Keep call notes short, accurate, and relevant. For example, include information that may help another team member understand the conversation without listening to the entire recording.

    Review Recordings When Needed

    Use recordings to revisit important conversation details, clarify information, or support internal call reviews. However, avoid accessing recordings unnecessarily.

    Handle Downloaded Files Carefully

    If you download a recording, store it only in approved locations. Furthermore, follow your organization’s access, privacy, and retention policies. Avoid sharing customer recordings through unauthorized channels.

    Frequently Asked Questions About Call Recordings in DialNext

    1. When are Call Recordings Available in DialNext?

    Call recordings are available through Call Logs when a recording has been generated and is accessible for the selected call. Therefore, you can open the relevant call record and check its Recording section.

    2. Where Can I Find Call Recordings in DialNext?

    You can find available recordings in the Call Logs section of your DialNext dashboard. First, select the relevant call. Then, open its Details tab and locate the Recording section.

    3. Can I Listen to a Call Recording More Than Once?

    Yes. If a recording is available, you can play it again whenever you need to revisit the conversation. Additionally, this makes it easier to check specific details from previous interactions.

    4. Can I Download Call Recordings in DialNext?

    Yes. You can download an available recording using the Download icon next to the audio player, provided the download option is enabled for that recording.

    5. Can I Adjust the Playback Speed of Call Recordings?

    Yes. You can use the playback speed control in the audio player to adjust the listening speed. This allows you to review recordings at a pace that suits your requirements.

    6. Can I Add Notes and Tags to a Call Record?

    Yes. The Notes & Tags section provides options to add notes and tags to the selected call record. Additionally, you can review the available star rating associated with that call.

    7. What Should I Do If a Call Recording Is Unavailable?

    First, open the correct call record and check its Details tab for the Recording section. If no recording is available, contact your workspace administrator to confirm the relevant recording settings and access permissions.

    However, if the issue continues, contact DialNext Support for further assistance.

    Conclusion

    DialNext makes it easier to access and manage available call recordings through the Call Logs section. Users can listen to previous conversations, download recordings when the option is available, and organize call information using notes and tags.

    Moreover, keeping relevant call details organized helps teams revisit customer interactions and refer to important conversation details whenever needed. By following appropriate recording and data-handling practices, businesses can manage their call records more effectively.

    Manage Your Business Calls with DialNext

    Looking for a simpler way to manage business conversations? DialNext brings business calling and call management features together to help teams handle customer interactions more effectively.

    Explore DialNext to learn more about its business communication solutions.

    Need assistance? Contact our team at support@dialnext.io.

    Related Articles

    Explore these guides to learn more about managing calls and using DialNext features:

  • DialNext Jobber Integration: How to Connect Jobber with DialNext?

    DialNext Jobber Integration: How to Connect Jobber with DialNext?

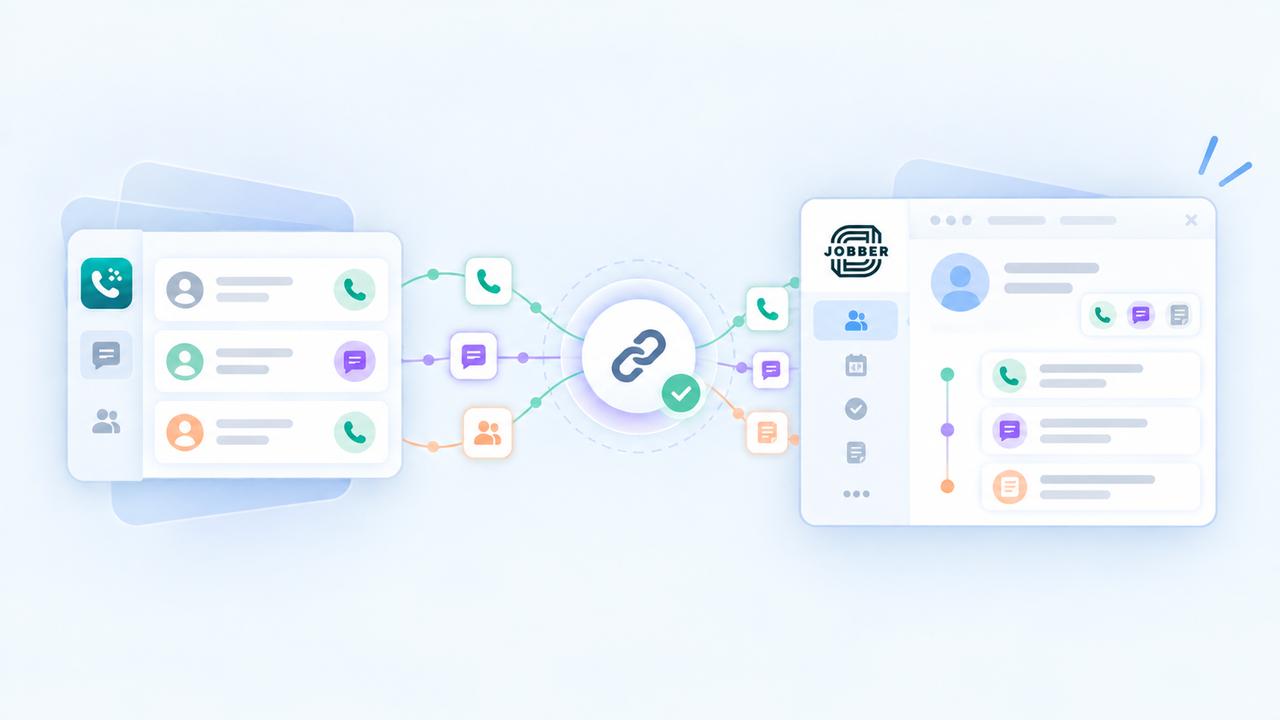
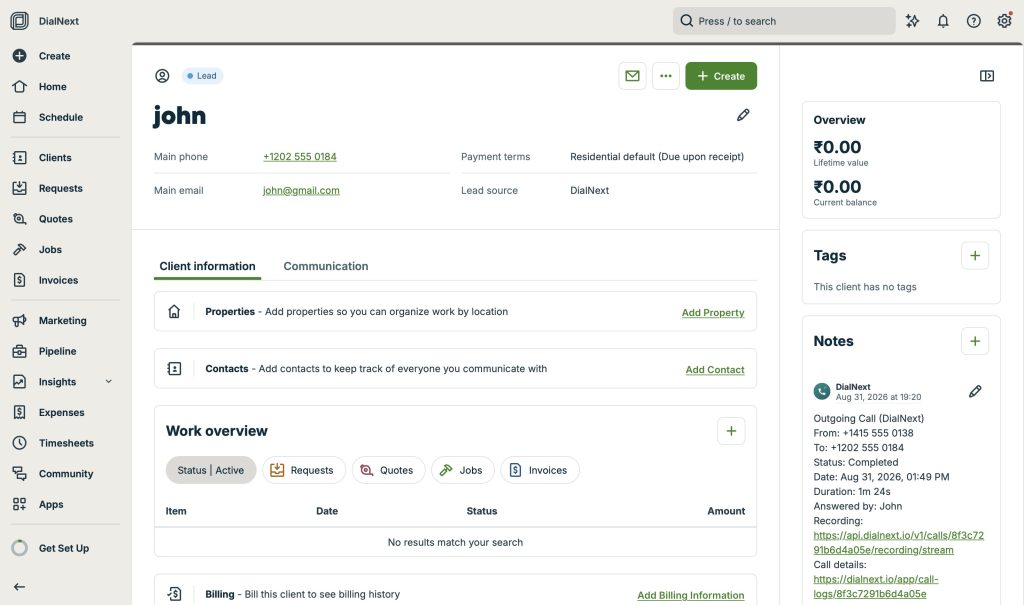
    DialNext Jobber integration lets you connect your DialNext account with Jobber and log call and SMS activity directly as notes on Jobber clients. Follow the steps below to complete the integration quickly and start keeping your client communication organized.

    How to integrate DialNext with Jobber

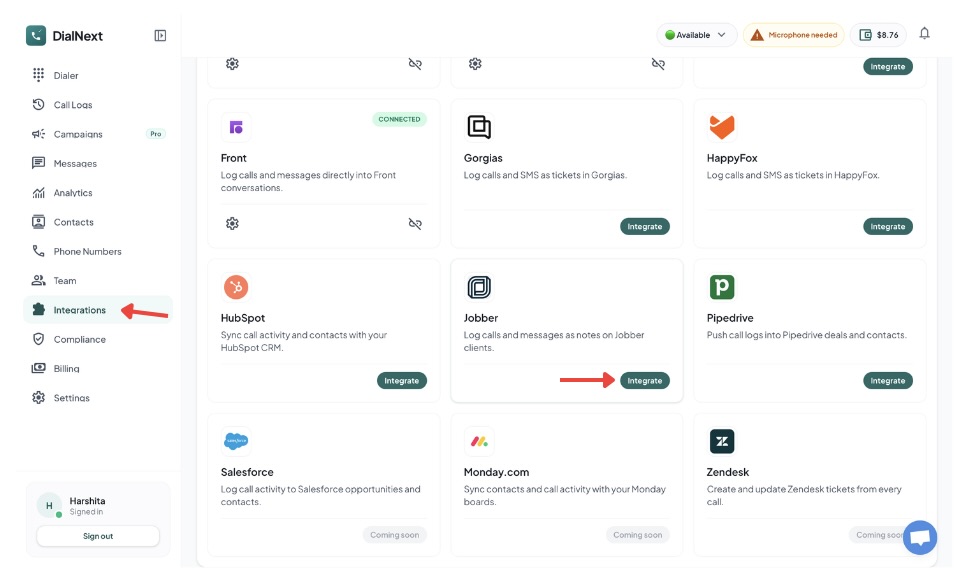
    1. Log in or sign up to your DialNext account.

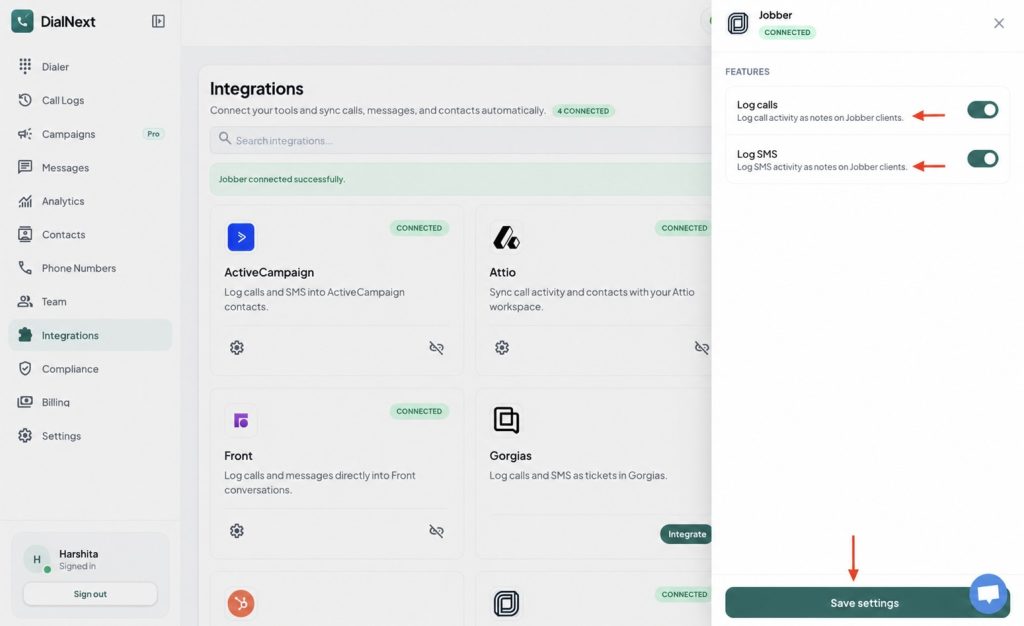
    2. In the left sidebar, click Integrations.

    3. Find Jobber in the integrations list and click Integrate.

    4. Authorize the connection between DialNext and Jobber.

    5. Choose the features you want to enable.

    6. Click Save settings to complete the integration.

    7. Make a test call or send an SMS from DialNext to verify that the activity is logged in Jobber.

    Your DialNext account is now successfully connected to Jobber.

    What does the DialNext Jobber integration do?

    The DialNext Jobber integration helps you keep your client communication organized by connecting your DialNext account with Jobber. Once connected, call activity and SMS activity can be logged as notes on your Jobber clients. This makes it easier to keep track of customer interactions without manually adding communication details to Jobber.

    How to use the integration

    After completing the DialNext Jobber integration, make sure the required features are enabled in the integration settings. You can enable call logging and SMS logging based on your workflow. Once the settings are saved, your DialNext communication activity can be recorded in Jobber client notes.


    If you encounter any issues, you can reach us at help@dialnext.io