Author: Harshita Upreti

  • DialNext Gorgias Integration: Connect Gorgias with DialNext

    DialNext Gorgias Integration: Connect Gorgias with DialNext

    DialNext Gorgias integration lets you connect your DialNext account with Gorgias and log call and SMS activity directly as tickets in Gorgias. Follow the steps below to complete the integration and keep your customer communication organized.

    How to integrate DialNext with Gorgias

    1. Log in or sign up to your DialNext account.
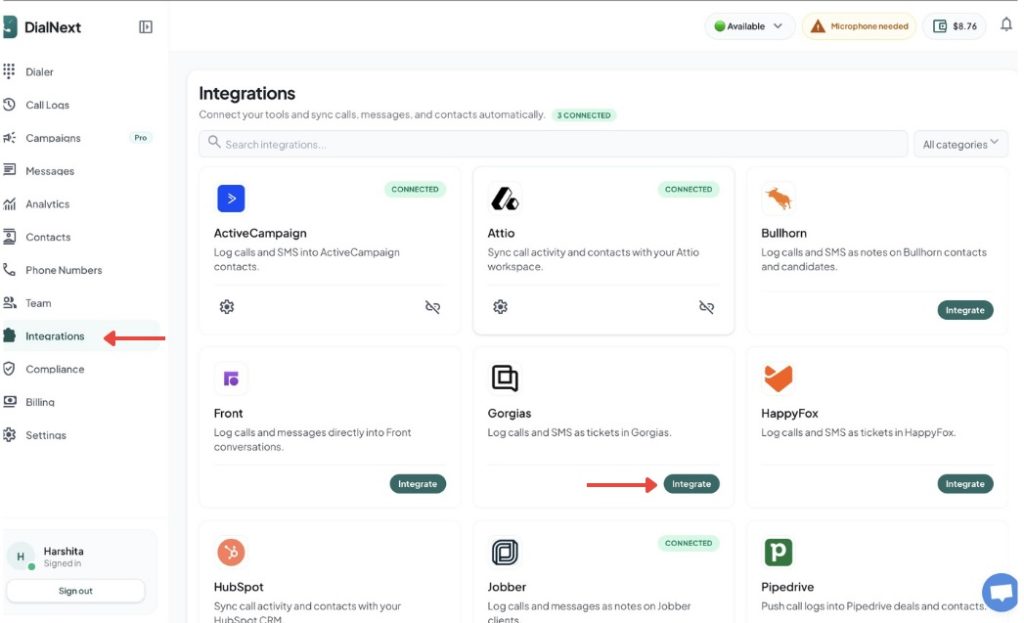
    2. In the left sidebar, click Integrations.
    3. Find Gorgias in the integrations list and click Integrate.
    4. Authorize the connection between DialNext and Gorgias.

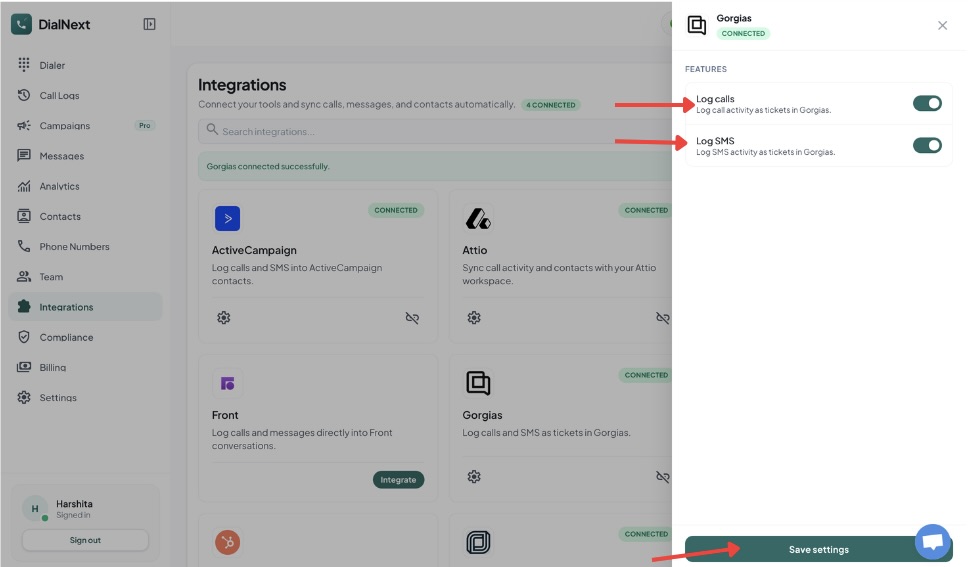
    5. Choose the features you want to enable.

    6. Click Save settings to complete the integration.
    7. Make a test call or send an SMS from DialNext to verify that the activity is logged in Gorgias.
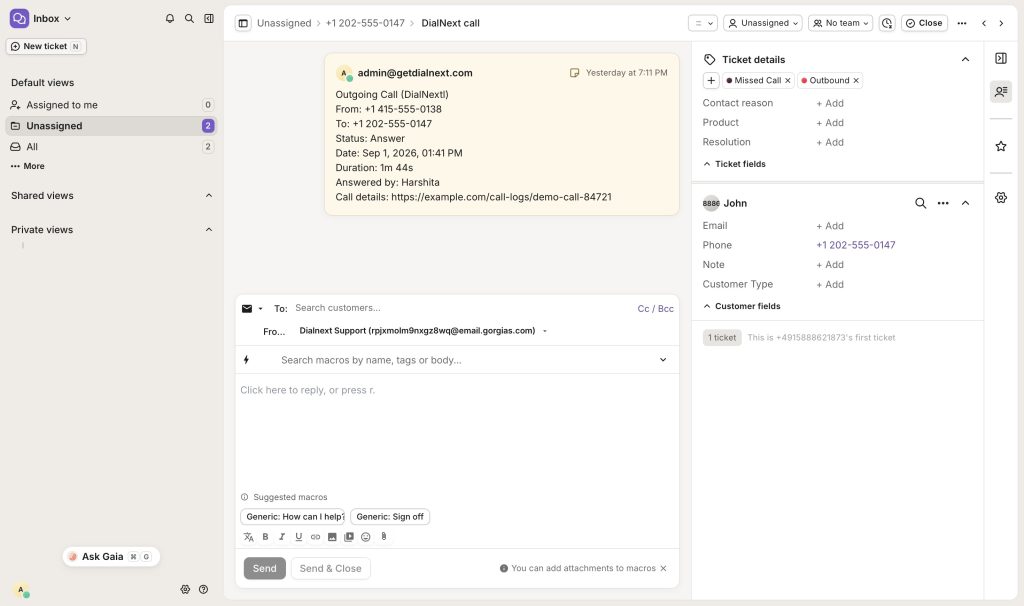
    Your DialNext account is now successfully connected to Gorgias.

    What does the DialNext Gorgias integration do?

    The DialNext Gorgias integration connects your DialNext account with Gorgias so your team can manage customer communication in one place. Once connected, DialNext can log call and SMS activity directly in Gorgias tickets.

    This integration helps support teams keep communication records organized. Instead of manually adding call or SMS details to each ticket, the activity can be recorded automatically. Your team can then review customer interactions while working inside Gorgias.

    You can enable the features that match your workflow and save the integration settings. After setup, make a test call or send an SMS from DialNext to confirm that the activity appears correctly in Gorgias.

    How to use the integration

    After completing the DialNext Gorgias integration, make sure the required features are enabled in the integration settings.

    You can enable call logging and SMS logging based on your workflow. Once the settings are saved, calls and SMS messages made through DialNext can be recorded as tickets in Gorgias.

    If you encounter any issues, you can reach us at help@dialnext.io
  • DialNext Jobber Integration: How to Connect Jobber with DialNext?

    DialNext Jobber Integration: How to Connect Jobber with DialNext?

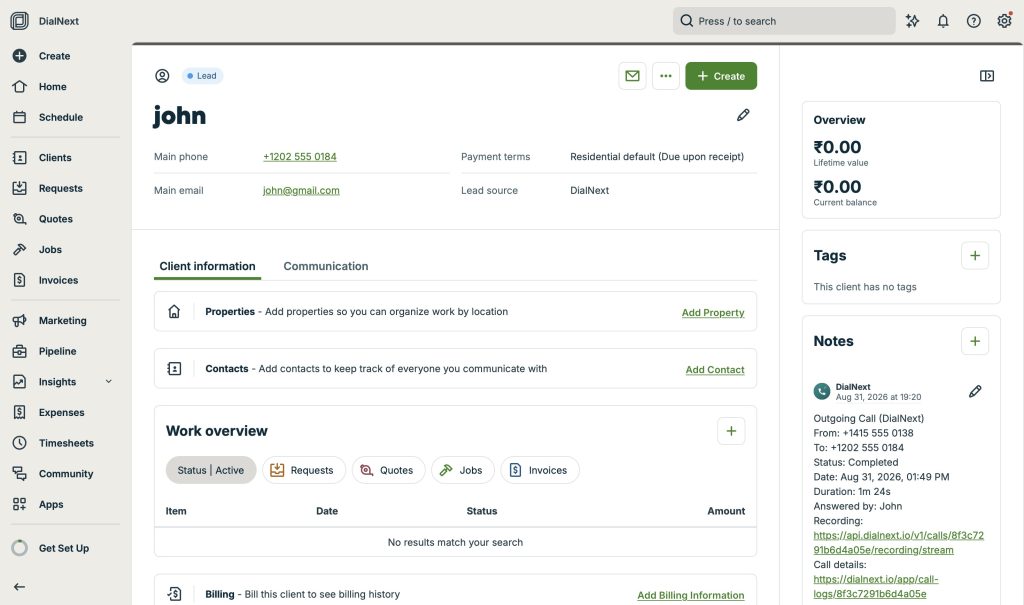
    DialNext Jobber integration lets you connect your DialNext account with Jobber and log call and SMS activity directly as notes on Jobber clients. Follow the steps below to complete the integration quickly and start keeping your client communication organized.

    How to integrate DialNext with Jobber

    1. Log in or sign up to your DialNext account.

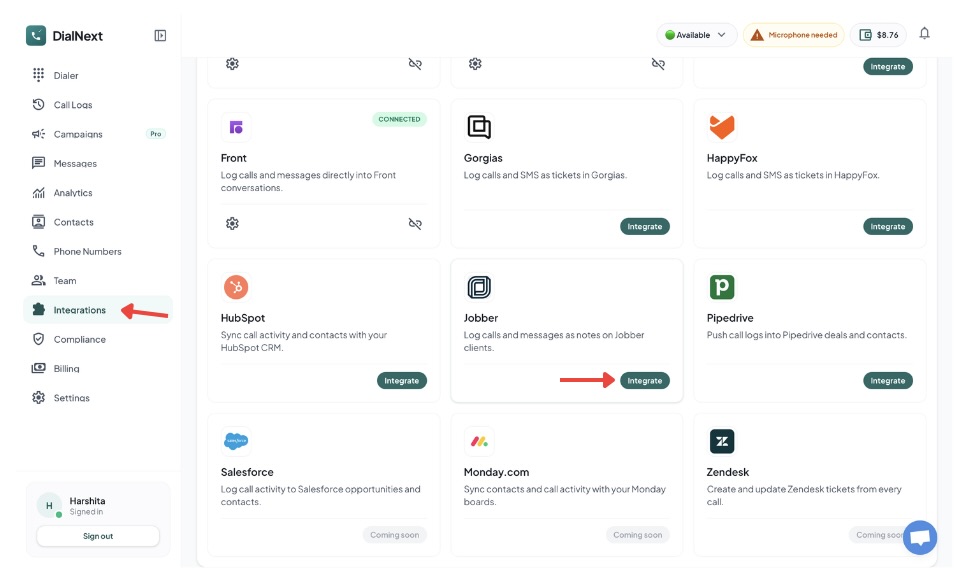
    2. In the left sidebar, click Integrations.

    3. Find Jobber in the integrations list and click Integrate.

    4. Authorize the connection between DialNext and Jobber.

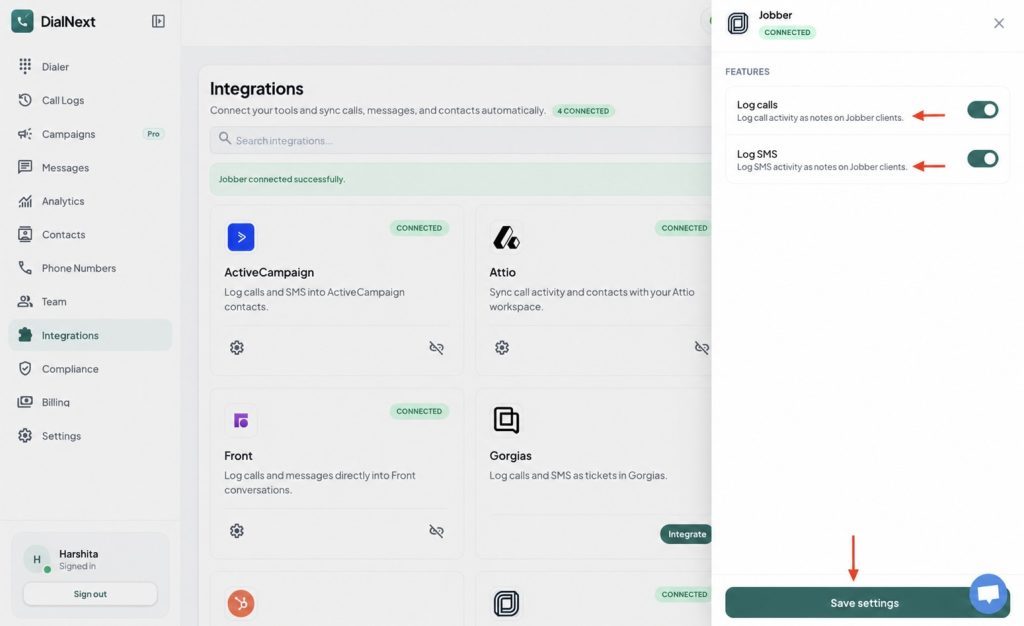
    5. Choose the features you want to enable.

    6. Click Save settings to complete the integration.

    7. Make a test call or send an SMS from DialNext to verify that the activity is logged in Jobber.

    Your DialNext account is now successfully connected to Jobber.

    What does the DialNext Jobber integration do?

    The DialNext Jobber integration helps you keep your client communication organized by connecting your DialNext account with Jobber. Once connected, call activity and SMS activity can be logged as notes on your Jobber clients. This makes it easier to keep track of customer interactions without manually adding communication details to Jobber.

    How to use the integration

    After completing the DialNext Jobber integration, make sure the required features are enabled in the integration settings. You can enable call logging and SMS logging based on your workflow. Once the settings are saved, your DialNext communication activity can be recorded in Jobber client notes.


    If you encounter any issues, you can reach us at help@dialnext.io
  • How to integrate DialNext with Attio?

    How to integrate DialNext with Attio?

    Integrate DialNext with Attio in a few simple steps.

    How to integrate DialNext with Attio

    1. Log in or sign up to your DialNext account.
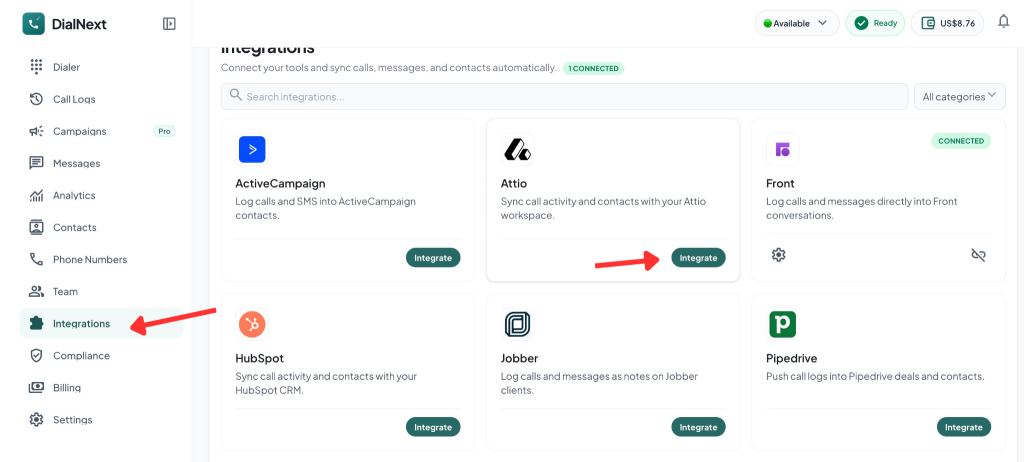
    2. In the left sidebar, click Integrations.
    3. Find Attio in the integrations list and click Integrate.

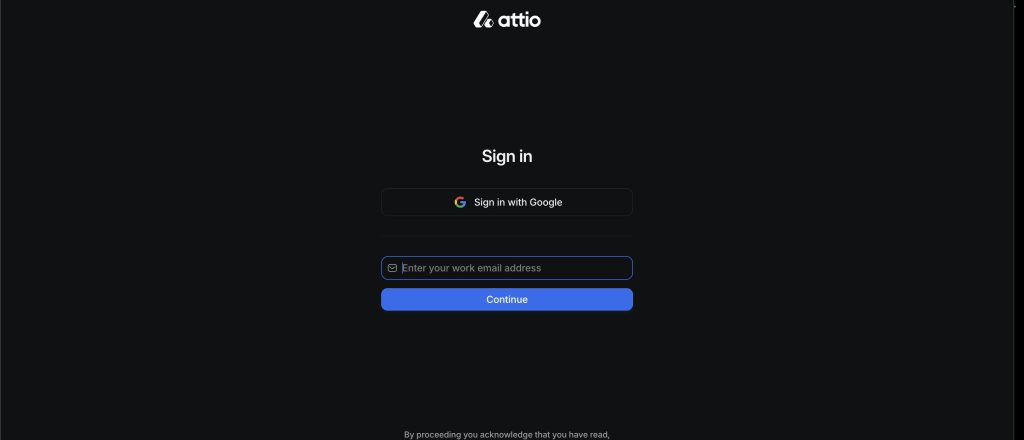
    4. Sign in to your Attio account using your work email or Google.

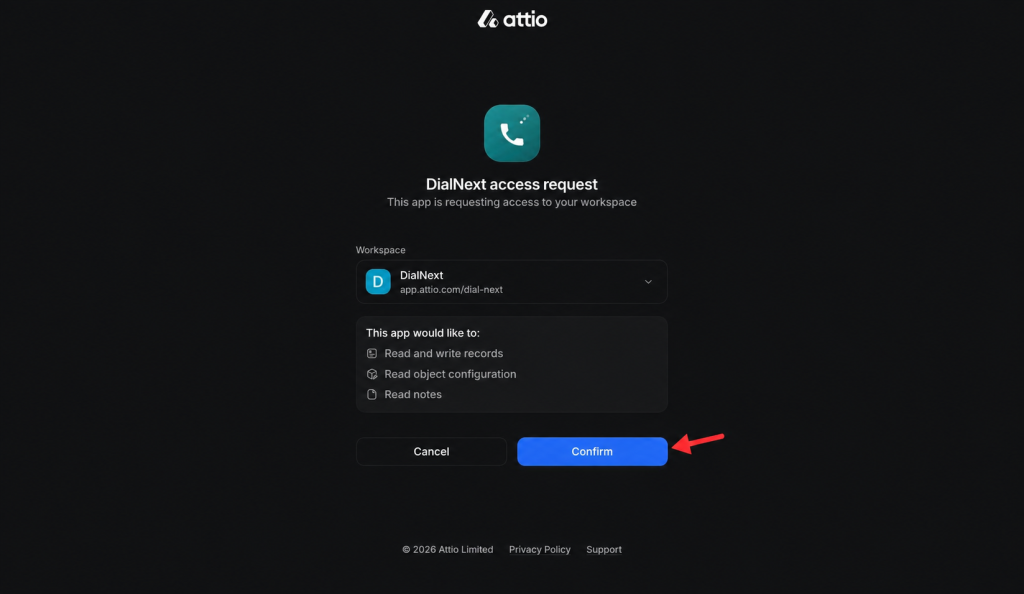
    5. Select your DialNext workspace and click Confirm to Authorize the connection.

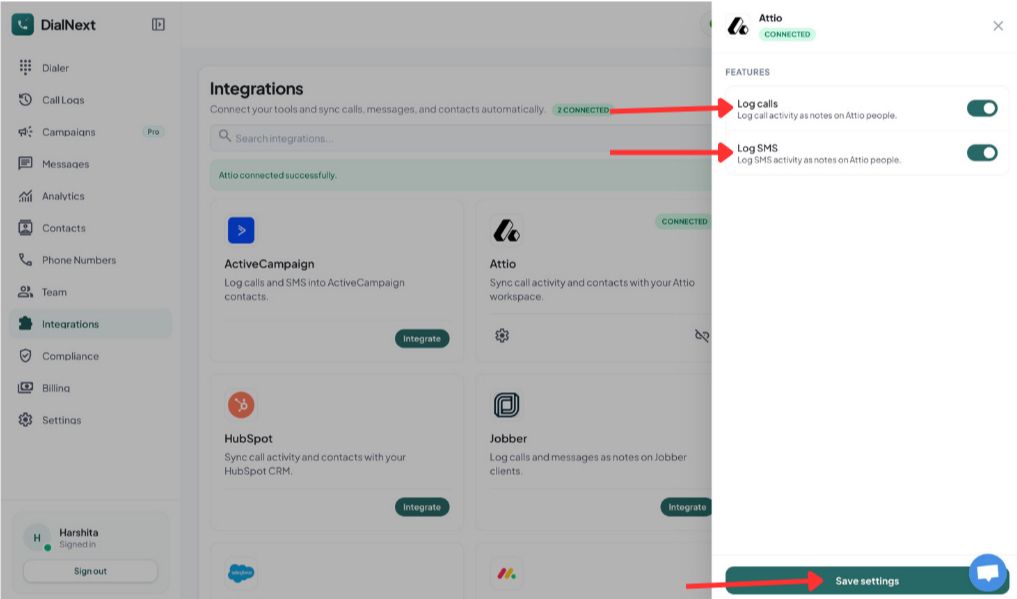
    6.Choose the features you want to enable, then click Save settings.

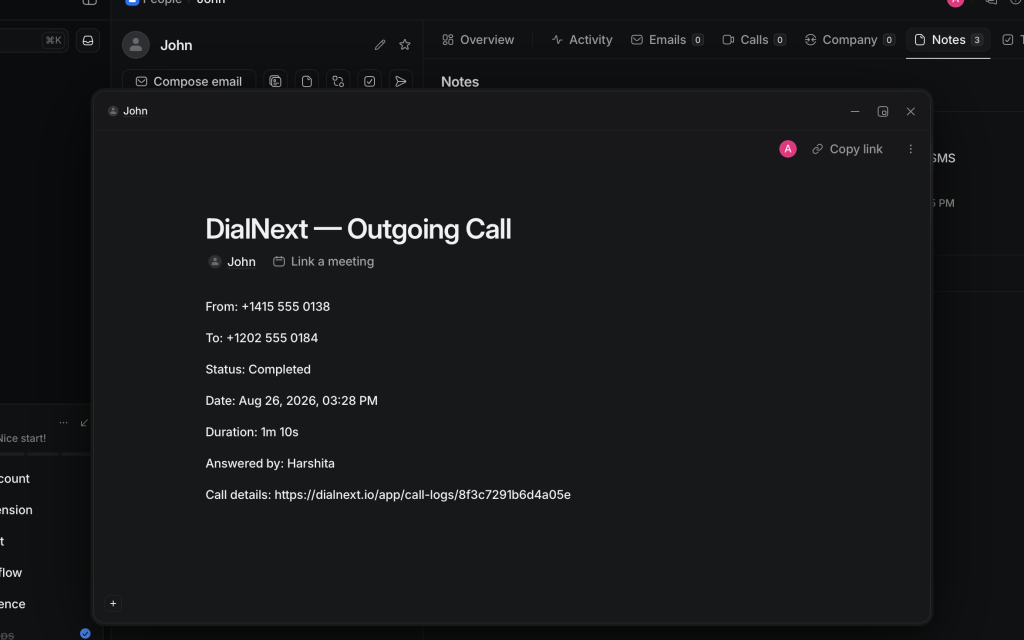
    7. Make a test call or send an SMS from DialNext to verify that the activity is logged in Attio.

    Your DialNext account is now successfully connected to Attio.

    If you encounter any issues, you can reach us at help@dialnext.io.